Showing posts with label euryops. Show all posts

9 November 2010

autumn daisy exotica

Autumn is a well known daisy season with displays of the herbaceous prairie daisies; aster, helenium, helianthus, stealing the limelight in many gardens.  The majority originate from moist meadows with deep rich soil and in the main do poorly here - the garden is just too dry.  For autumnal daisy-ness here I have been enjoying for weeks the re-flowering of two exotic shrubs from South Africa, the Kingfisher Daisy, Felicia amelloides, and the African Bush Daisy, Euryops chrysanthemoides, both coming into flower after the first rains of autumn.    


The Kingfisher daisy is a small sub-shrub about a foot high and it makes a loose sprawling mound covered with bright blue, yellow-eyed daisies over a long period.  It is sold for summer bedding and hanging baskets and will flower throughout summer if it stays regularly moist and is dead-headed frequently.  Here it grows in a tub with a blue fescue grass and some tree sedum, Sedum praeltum, with stone filled rubbish soil and never receives enough water to keep on flowering. I don't mind when it  shuts up shop at the start of summer as I know it will freshens up when the weather cools in autumn just when the intense blue flowers will be most admired.  It is not fully hardy but has been growing outside here for five years, no doubt the dry, free-draining tub helped it with the freezing temperatures of last winter when others growing in heavier soil elsewhere in the garden turned up their toes.  Easily rooted from cuttings they are good doers in sunny containers.   


(my camera doesn't 'like' blue in low autumn light - they are much brighter and a purer blue than they look here).

Migrainingly intense in bright summer sun the large yellow daisies of the African Bush Daisy seem to my eye to be better suited to the grey days of autumn - not that I have any say in the matter as they flower non-stop except when too cold or too dry.  Another plant sold as disposable summer bedding they will make permanent shrubs in sheltered, well drained sites.  It is incredibly drought tolerant when established as you would expect with its South African roots (few plants can sit unpotted and forgotten  under a bench all summer to grow away untroubled when finally planted - this can) it is also surprisingly cold-hardy, only showing its displeasure in winter by flushing an unhappy bronze (which is rather attractive anyway).  


The largest bush at the Phoenix has made a big dense mound six foot across and nearly as tall in five years.  In full flush it will be covered in hundreds of 6cm flowers.  To keep it tidy I deadhead as best as I can (it is tiresome), without this attention it will still flower on and on but it does get annoyingly messy.  Deadheading  involves snipping each separate flower head off at the base of the stalk.  If the heads are just pulled off the stalks remaining dry to knuckle-stabbing sharpness and you will have pin-cushion hands next time you go in, if you shear it the new buds growing beneath get snipped off too, so it must be one by one but it is worth the trouble.
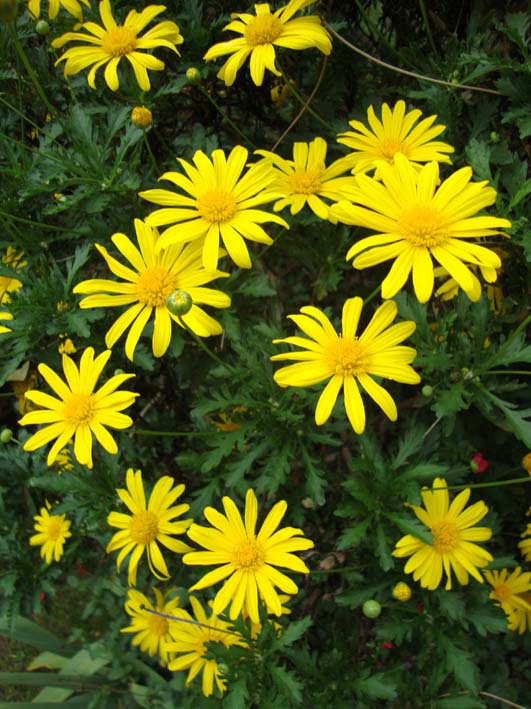

These bushes have been repeated through the garden for their reliable, if brassy, flowering and lumpy mounded forms and they visually tie the garden together, particularly at this time of year when they glow in the low autumn light.  


These two daisies may be far flung from their exotic beginnings but they are good doers in this city garden.  Grow them.  

time to plant

and it should take time.

Gardening atop rubble at the Phoenix means new plants can struggle to establish in the summer-dry conditions so we try and tip the balance in the plant's favour with proper planting at the right time and in the right way.  Now the soil is moist with autumn rain it is the perfect time to plant as the roots can get well established long before the soil dries out again next summer.  Few plants will make it here if just plonked in and summer-dry gardens are unforgiving of corners cut at this point. To give the best chance of survival I am particular in how we prepare the planting holes and time taken doing this now is time well spent. 

Here Peter is clearing a space between a clump of Geranium x oxonianum and the comfrey, Symphytum caucasicum, to dig a hole for a Daisy Bush, Euryops chrysanthemoides.  These are both greedy bullies and it would be no good tucking anything in tightly between these thugs so an area 3ft across cleared of their roots is needed (established, the Daisy Bush will stand above them both and be able to hold it's own).  
Even without such nasty bedmates to contend with a planting hole needs to be at least twice the size of the new rootball to give room for the new roots to grow.  This is especially important on compacted soils.  It can take some doing.  

Here, having cleared a good space of ivy root, Pauline gets to loosening compacted rubble with a steel bar, to plant...

this too-long-in-the-pot and rather leggy, Buddleja officinalis - early flowering, drought tolerant and borderline hardy (more on this no doubt if it gets through the winter).  


From a hole twice the size of the pot came this collection - to add to the ever-growing pile of rubble by the office.  


[Remember, most plants don't mind growing in stony soils and the roots simply grow around any rocks or stones, which makes sense, 'the wild' not being stone free.  We simply remove those that physically prevent the planting hole being dug - if we took out more the garden would sink dramatically!]


The soil is dug out into a barrow or bucket - much easier than dumping a heap on the ground amongst other plants.  It is always surprising how much soil comes out of even a small hole - Pauline's plastic barrow is bulging! 

The excavated soil is always mixed with a couple of shovel-loads of compost, compost holds moisture in the soil, provides nutrients and brings the soil to life around the new plant and it good as guarantees success.    The plant goes in the hole at the same level it was growing in the pot - deeper and the now-buried stems can rot.  The compost-improved soil is filled in round the rootball bit by bit, firming well as we go.  

I always go on and on about firming the soil AROUND the rootball and not the rootball itself - all too often a vigorous firming on top of the rootball produces a tearing sound as the roots are ripped off the plant.  This obviously defeats the object.   We aren't looking to push the plant down into the centre of the earth, it should be at the right depth already (if it isn't take it out and dig a bit deeper!), just firming the in-fill with steady pressure using your knuckles will be enough to remove big spaces and to hold it firm while it roots (taller things, that the wind will rock, will need staking).  

I get asked how hard to firm.  I say "firmly".  This means it shouldn't hurt you or the plant.  I dislocated my thumb a couple of years ago firming - now that was definitely too hard!  


Then we water.  Properly. A whole can for each plant, sometimes two.  This takes time to soak in below the rootball so we don't rush.  Deep watering encourages the new roots to grow deeply as they follow the moisture down.  They will need to root deeply as they will only get another can or two next year as they establish but otherwise will receive no additional watering.  Ever.
  

After watering the plants get a good layer of mulch.  This prevents moisture being sucked out of the soil by the wind and competing 'weed' seeds from sprouting like cress.


Finally we pose (to order) for the camera and repeat the magic words - "Grow you bugger!".  

[Peter is a Phoenix Garden stalwart and has moved tons of rubble up and down the garden uncomplainingly during the renovations of the last few years with little chance to green his rubble-worn fingers.  Looks like he relished the opportunity to repeat the magic words!)